Mcleod TMS
How Chain works with McLeod
In this guide, you will understand how a load that is inside of McLeod interacts with Chain.
Prerequisites:
- McLeod version 20.2 or higher for Booking capabilities in Chain
- McLeod version 22.1 or higher for Tracking capabilities in Chain
- DFM Module in McLeod’s PowerBroker software
- McLeod App Enabled in your Chain Workspace's Settings > Apps
- Chain Enterprise License
Additionally, you will need to have someone generate or obtain the following from your McLeod instance:
- set up a username and password within your PowerBroker application for Chain to use. See Generate a username and password for more information
- obtain the URL for your McLeod instance
Basics
- Order numbers are shown as the load number in Chain
- Each movement on an order will be its own load in Chain, with the same order number (same load number), but different stops
Setup in McLeod
The overall set up flow is as follows:
Generate an accountID in Chain to be used for McLeod.
Generate a username and password in McLeod for Chain to use, add the accountID from Chain, and Chain's URL to McLeod.
Provide the username and password to Chain for integration.
Generate an accountID in Chain
- Go to Settings > Apps
- Click on "Enable" under the McLeod app
- Click on "Generate Account ID" and copy the generated account ID. This will be used in the next steps.
For now, ignore the username and password fields. We will come back to these later.
Generate a username and password
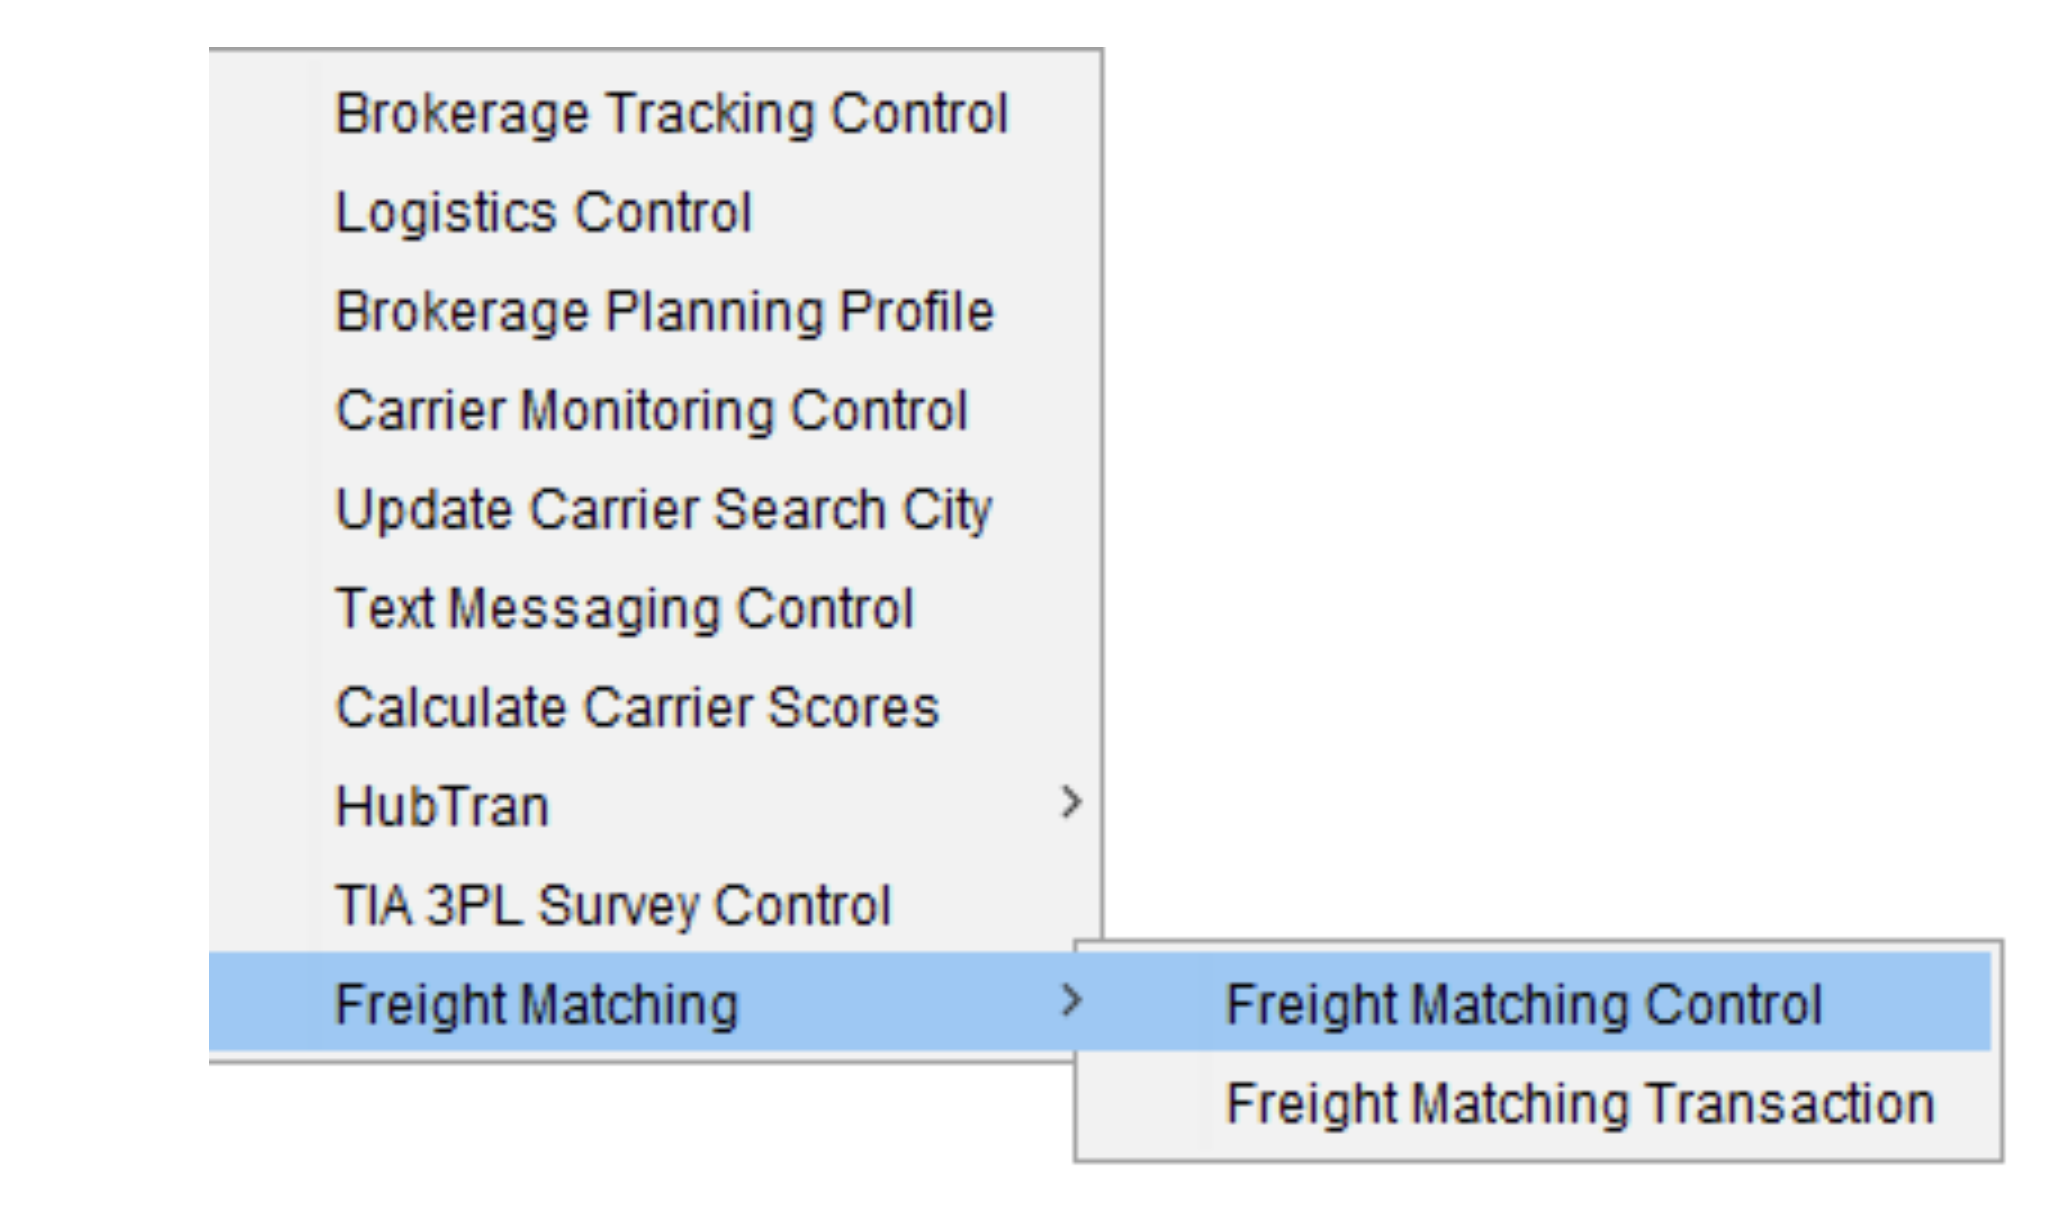
- Begin by setting up a vendor login id and password in Sys Admin > Brokerage > Freight Matching > Freight Matching Control
- Click Add.
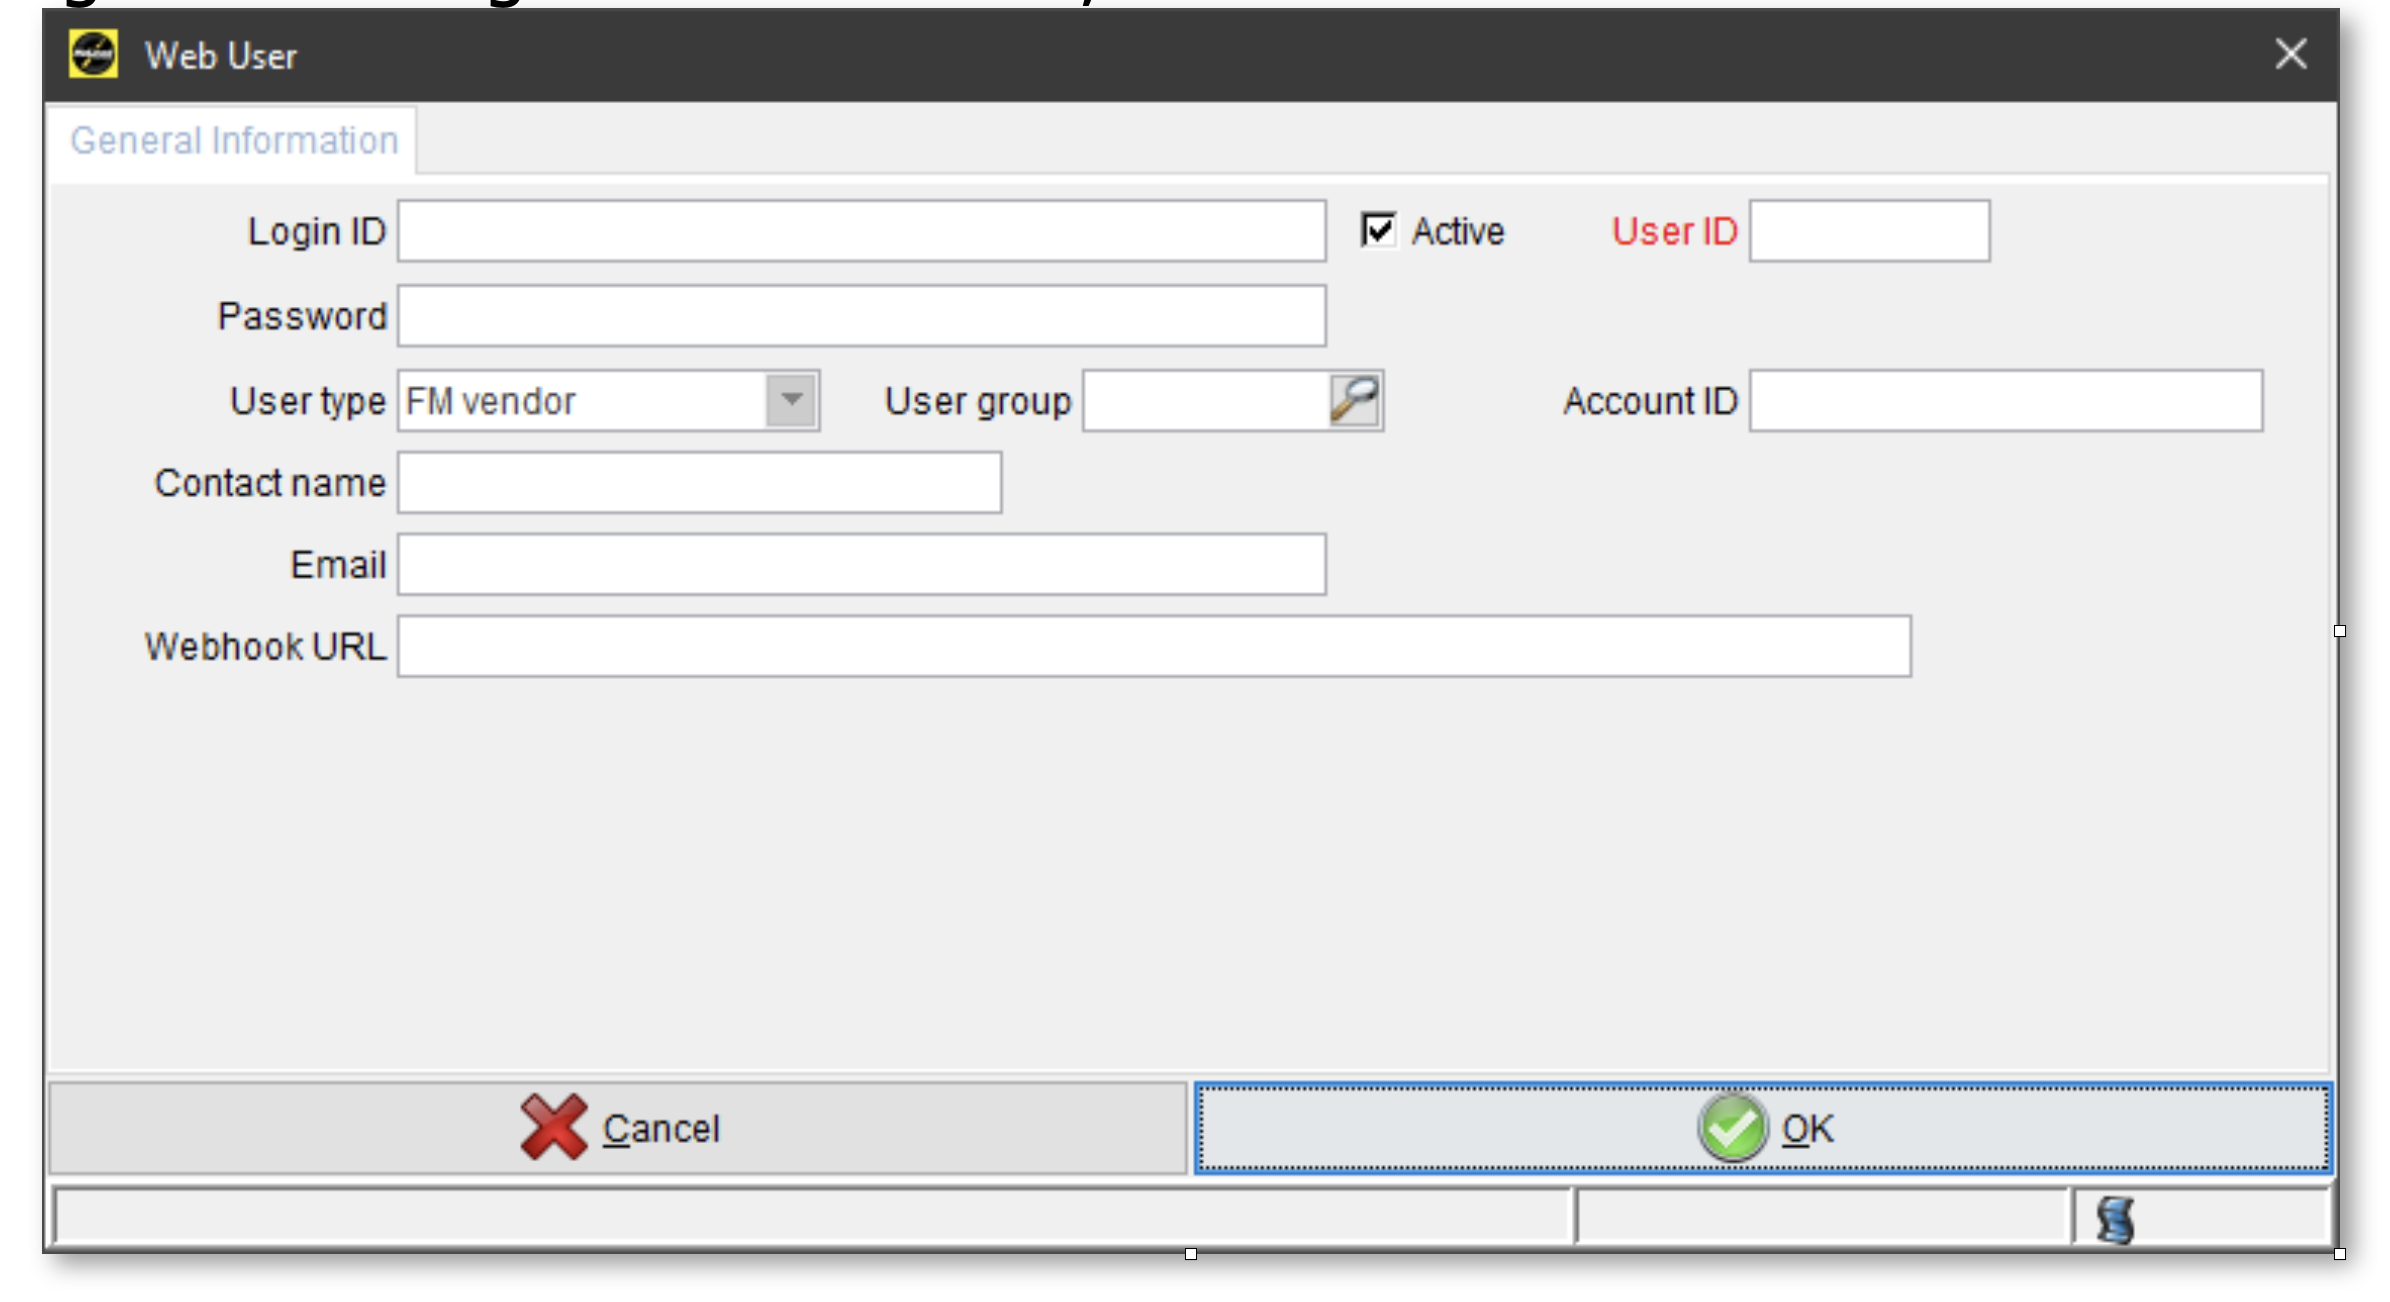
- Add a Login ID for Chain. You can use
ChainAPIor any other name you prefer. - Generate a secure password for Chain. It is recommended to to use a password greater than 12 characters with a mix of upper and lower case letters, numbers, and special characters. Note this password down as you will need to provide it to Chain.
- Make sure the "Active" checkbox is checked.
- Paste the Account ID from Chain into the "Account ID" field.
- Add the following for the vendor contact name and email:
   Name: Chain Dev Support
Email: dev-support@chaineapp.com - Under Webhook URL, paste the following:
https://api.chaineapp.com/apps/events/v1/mcleod
Click OK
Under the Freight Matching Control screen, make sure the newly created user ID for Chain is included under the "Load booking user(s)", "Create offer user(s)", and "Carrier pay rate provider(s)" sections.
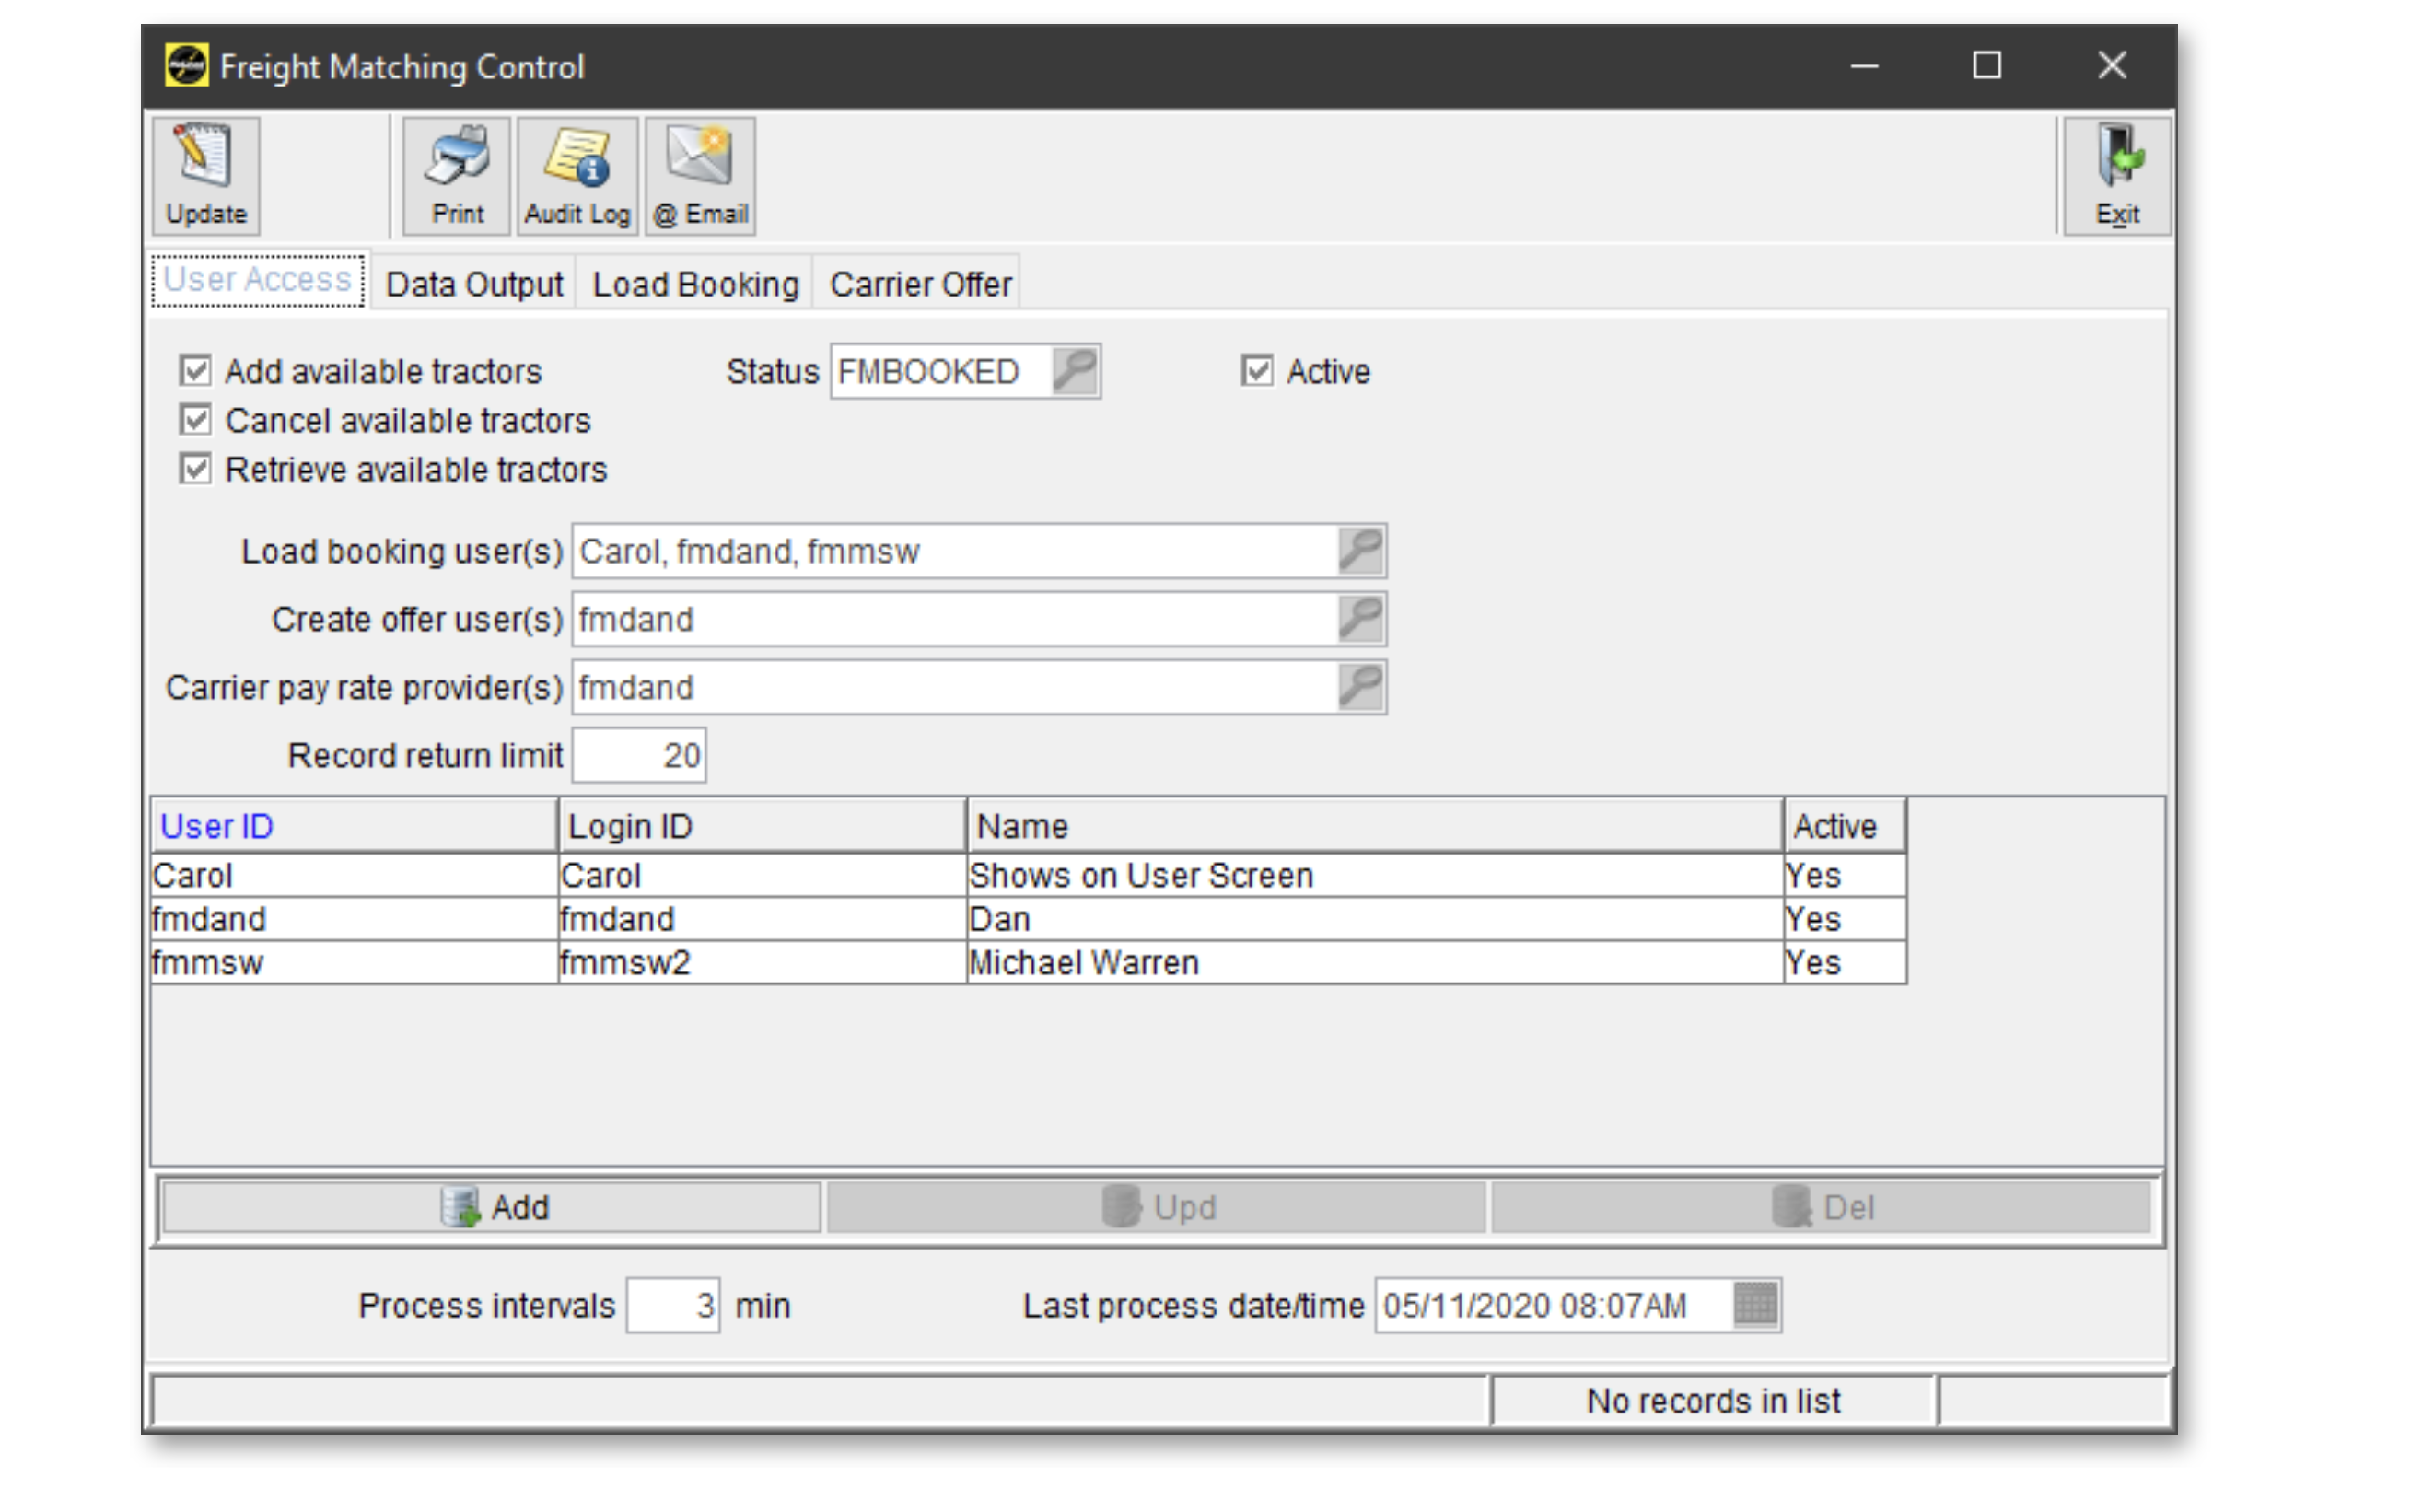
At the bottom of the Freight Matching Control, you will have "Process intervals". This allows you to specify how frequently the Freight Matching transaction records should be processed to be sent as notifications to the vendors for updates to your qualified loads and carriers. Values greater than 5 minutes are not recommended. If your system can handle it, 1 minute is recommended.
Other fields to send that will enhance the Chain experience are:
| Field Name | Table | Description |
|---|---|---|
| disable_automatic_tracking | drs_payee | Disable Driver App Tracking |
| dot_number | drs_payee | Carrier DOT Number |
| icc_number | drs_payee | ICC Number |
| override_drvr_cell | movement | Driver Cell Phone Number |
| dispatcherUser | movement | Dispatch User |
| carrier_email | movement | Carrier Email |
| carrier_tractor | movement | Carrier Tractor Number |
| carrier_trailer | movement | Carrier Trailer Number |
| max_buy_rate | movement | Maximum Rate to pay the carrier |
| override_pay_amt | movement | Rate paid to carrier |
| override_pay_rate | movement | - |
| override_targetpay | movement | Target rate to pay the carrier |
| external_tracking_link_url | movement | Custom field we ask you create to store any tracking links carriers provide |
| br_status_link | movement | tracking url of tracking provider (send if not using Chain's tracking) |
| br_track_status | movement | tracking status of tracking provider (send if not using Chain's tracking) |
| br_track_status_desc | movement | tracking status description of tracking provider (send if not using Chain's tracking) |
| bol_received | order | Field indicating whether the bill of lading was received |
| operationsUser | order | Operations User |
| revenue_code_id | order | Revenue Code ID |
| blnum | order | The customer's reference number. This is used in visibility provider apps like P44 or FourKites when needing to send data to them. |
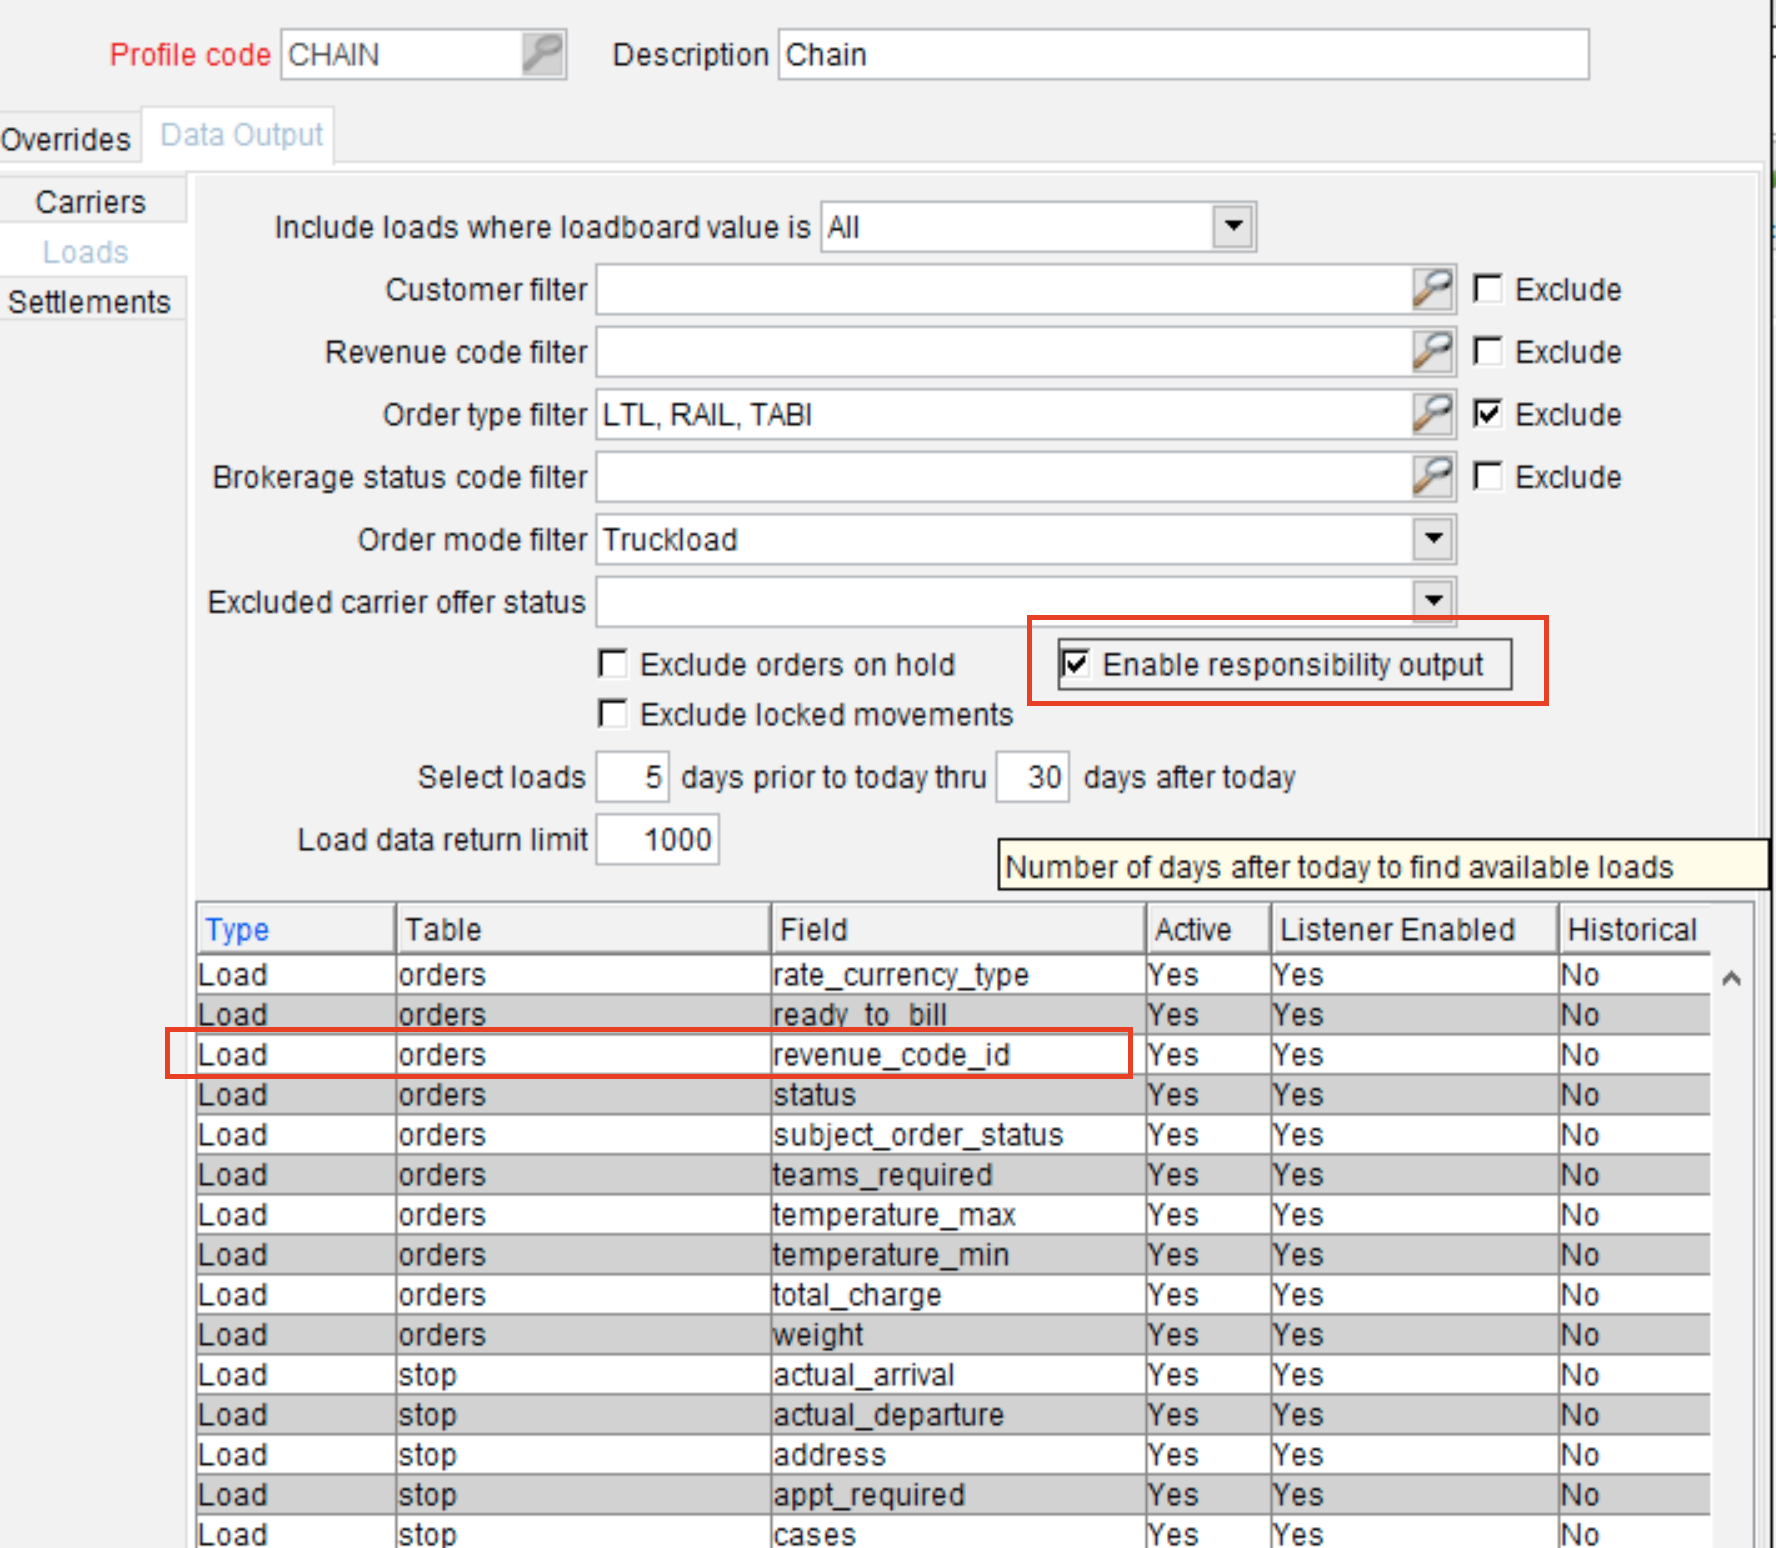
- Enable the "Responsibility Output" field in the Freight Matching Control.
Check the box "Enable responsibility output" and make sure the field "revenue_code_id" is checked. This is used to separate loads in different workspaces in Chain.
Add a new field to the movement table
We ask to create a new field on the movement called: external_tracking_link_url. This field is used to add any "external tracking link" that is provided by the carrier. This field will be sent to Chain and it will be tracked with data sent back to McLeod. Below are steps on how to add this field to the movement table.
Credit for the below steps goes to Brandon Bay at LGI.
Steps:
Step 1: Navigate to Sys Admin>Administration> Schema Editor
- Open Sys Admin> Administration >Schema Editor
- Use the search function to locate the ‘movement’ table schema.
Step 2: Add Field Information
Click on "Field Information."
Select "Add" to create a new field.
current field name = external_tracking_link_url
Data type = varchar Length = 80."
Step 3: Synchronize
- Navigate to "SQL Generator."
- Select "Single Table."
- Click "Synchronize" and then "Execute."
Step 4: Close and Reopen System Administration
- Close the current window.
- Go to Sys Admin> Field Marshall
- Go to "Field Marshall Manager."
- Select "Loadmaster Main Menu> Dispatch> Dispatch/Movements."
- Double-click on "Dispatch Agreements."
Step 6: Add External Tracking Link
- Decide on the placement of the new feature (e.g., below the next scheduled check).
- Add a "Single Line Text" field.
- Set the main screen source to "External Tracking Link URL."
Step 7: Verify in Development Environment
- Ensure you are in the development environment.
- Check for the presence of the external tracking link.
Setup in Chain
Return to the McLeod app in Chain and fill in the username and password fields with the username and password you created in McLeod.
You will also need to add your McLeod Instance URL. This is the URL you use to access McLeod. If you are unsure about this, please ask your McLeod rep on what your "Freight Matching Instance URL" is which is used to access the Freight Matching API for your instance.