Customer portal
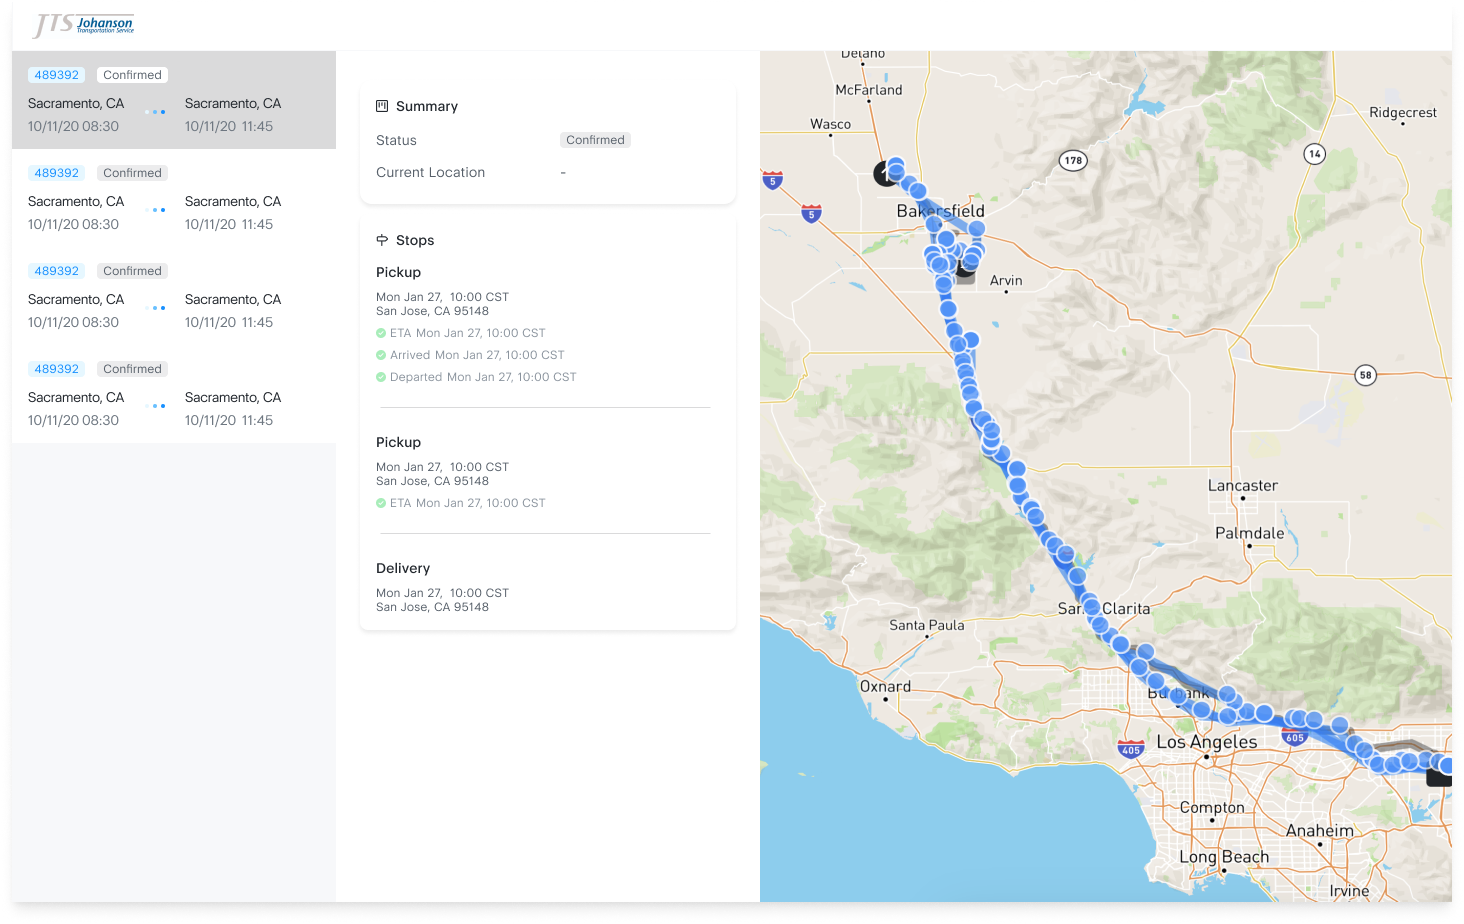
Customer views give you a way to share visibility on loads with your customers. The loads do not need to be tracking for you to share them with your customers. If they are tracking, the customer will see a map with the truck's location. If they are not tracking, the customer will still be able to view the current "status" of the load. The "status" the customer will see is not the same statuses you use, but they are designed to be more friendly to customers.
Here is an example of how the customer portal looks like:
Statuses a customer sees
| Status | Description |
|---|---|
| Confirmed | A load does not have an appt/FCFS time, and no other statuses are inputted |
| Scheduled for pickup | A load has an appt/FCFS time, and no other statuses are inputted |
| En route for Nth pickup | The Nth pickup has an ETA |
| Loading at Nth pickup | The Nth pickup is marked as arrived |
| En route to Nth delivery | The last pick is marked loaded or departed |
| Unloading at Nth delivery | The Nth drop location is marked arrived |
| En route to destination | Shown only if the Nth drop is the final destination |
| Unloading at destination | Shown only if the Nth drop is the final destination |
| Delivered | Final destination is marked unloaded or departed |
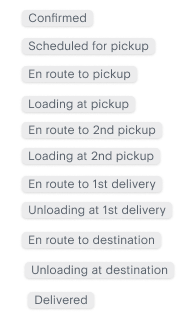
Here's how the statuses look:
Create a customer portal
To accomplish this, you have to create a new view, and then in the filters, add the appropriate filters you want (see the filter screenshot as an example).
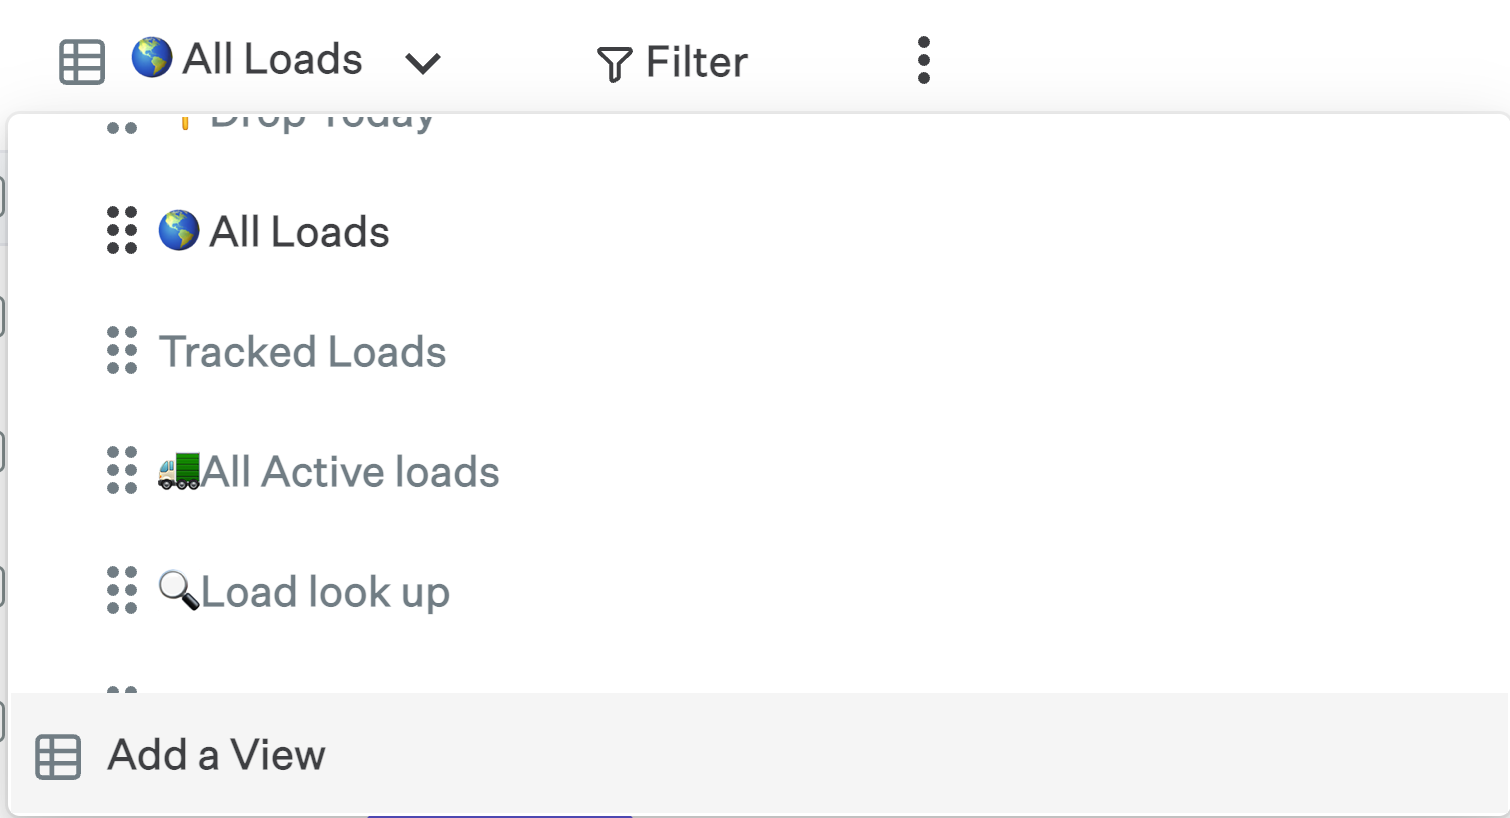
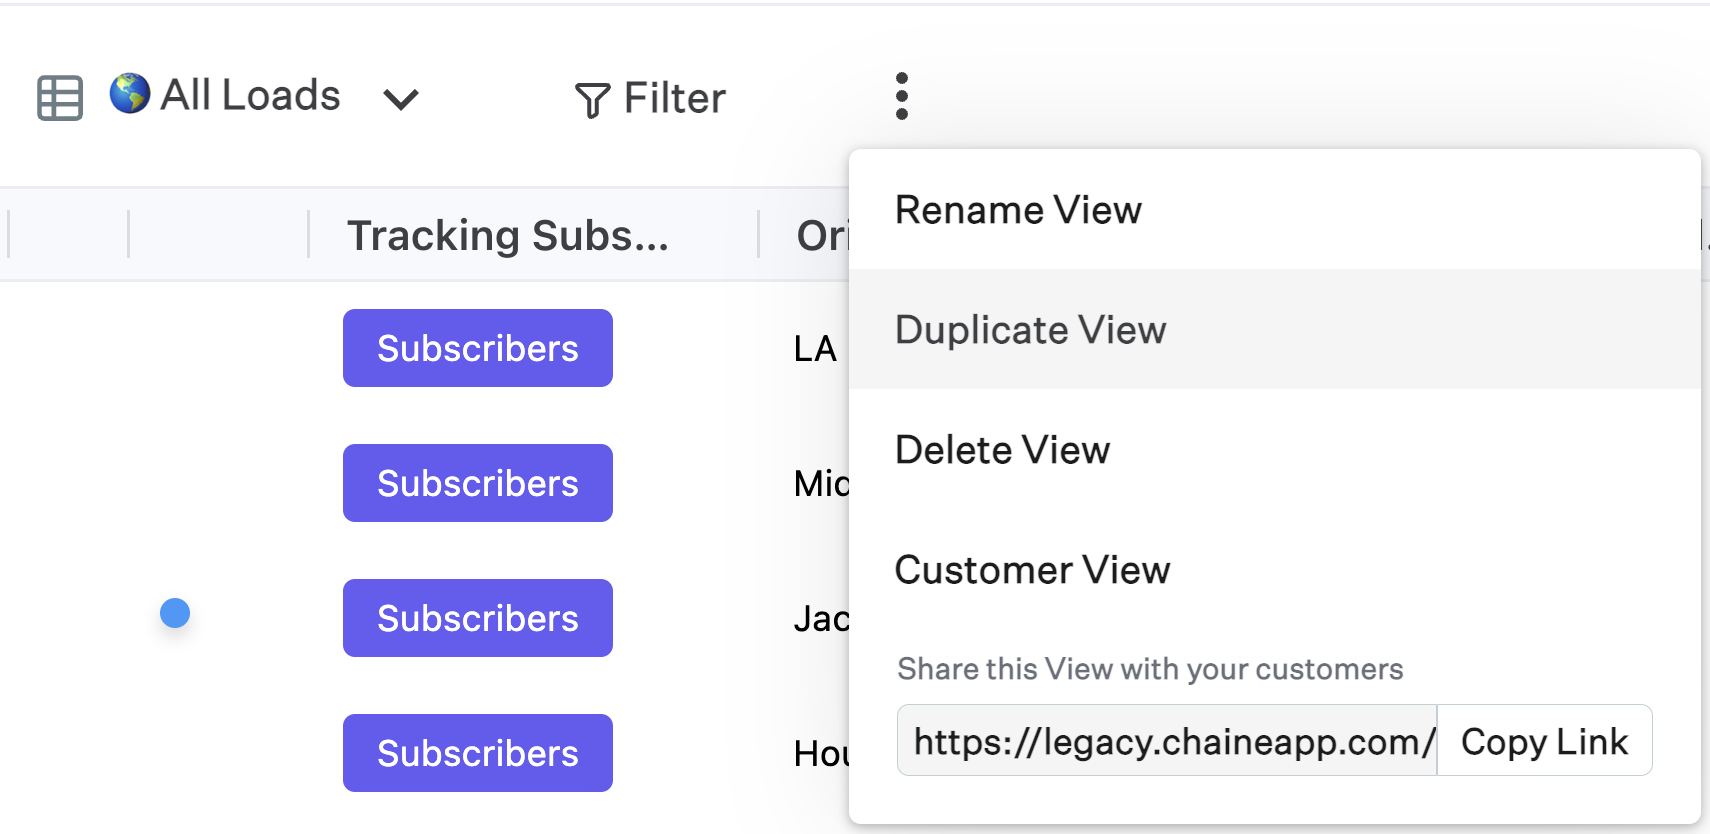
- Create a view by clicking "Add a view" in the view drop down. Alternatively, you can "Duplicate" an existing view so it copies over the filters by clicking the three dots on the right of the "filter" button
- Name the view after your customer.

Select the "Filter" button for this view, and click "Add a filter"
Scroll down to "Customer", and create a customer filter
Make sure the filter is of type "And". Then Select the "contains" option so your filter reads: "AND Customer contains"
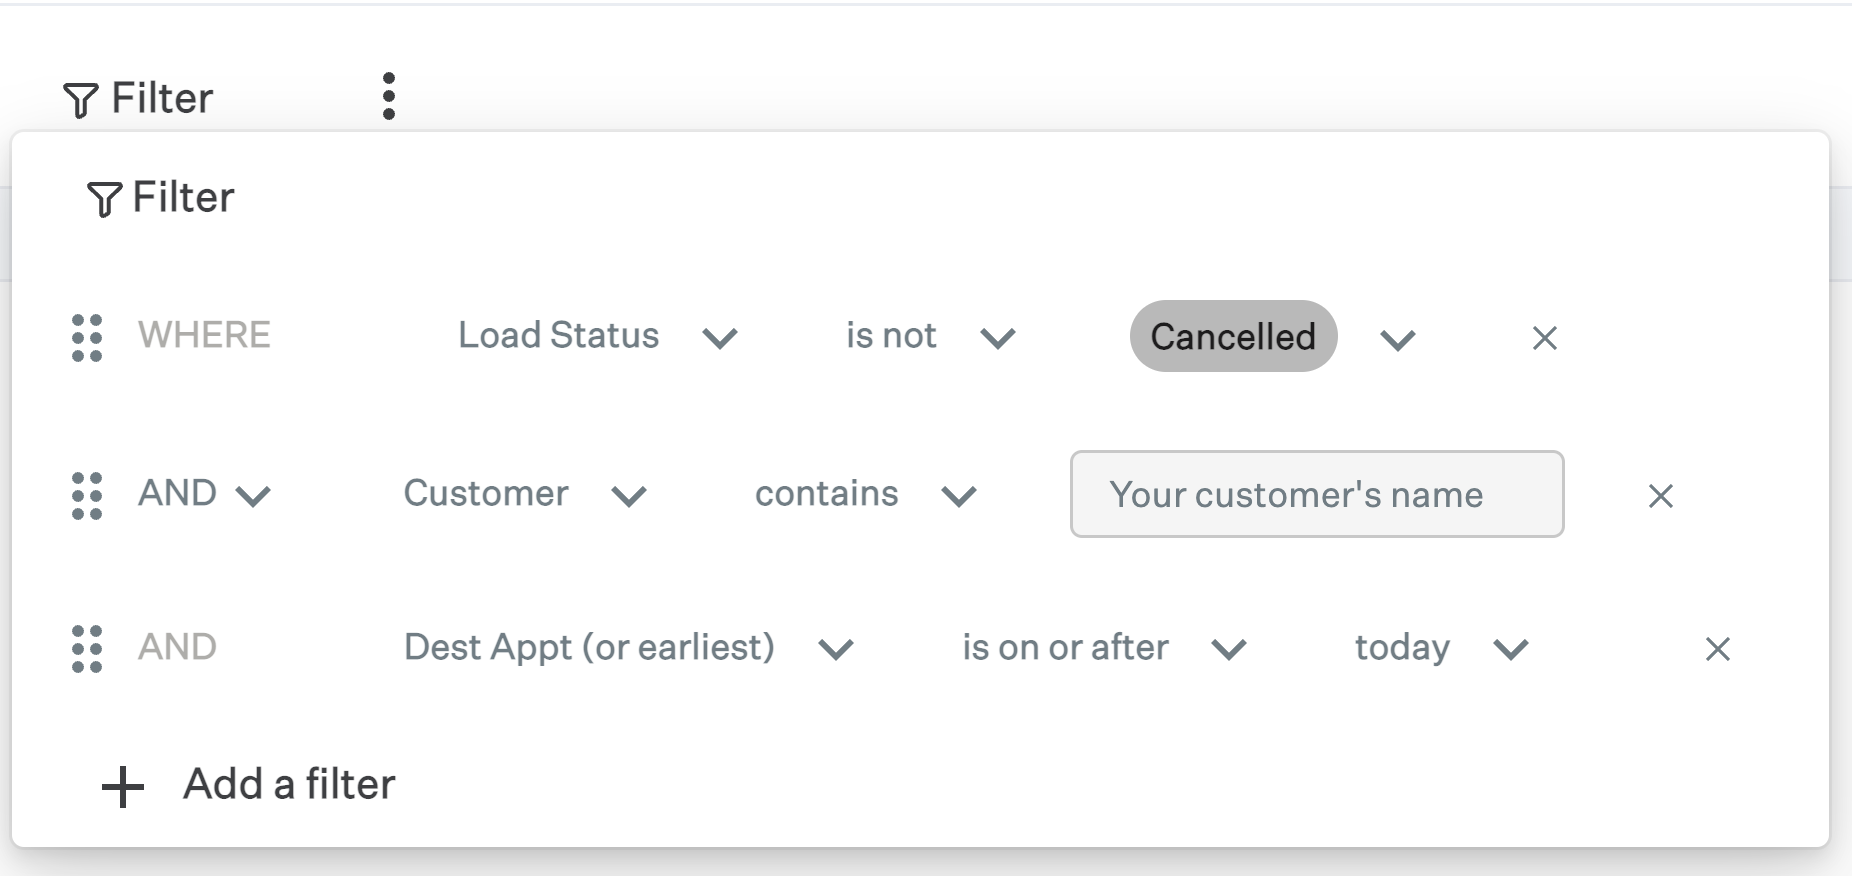
- Add the customer's name as it is coming in the customer column.
Edit any other filters if you want more fine grained controlled on the types of loads the customer sees.
Verify the loads that are showing, and adjust filters accordingly if needed
With the new view selected, click the three dots next to "filter", and click "Copy Link".
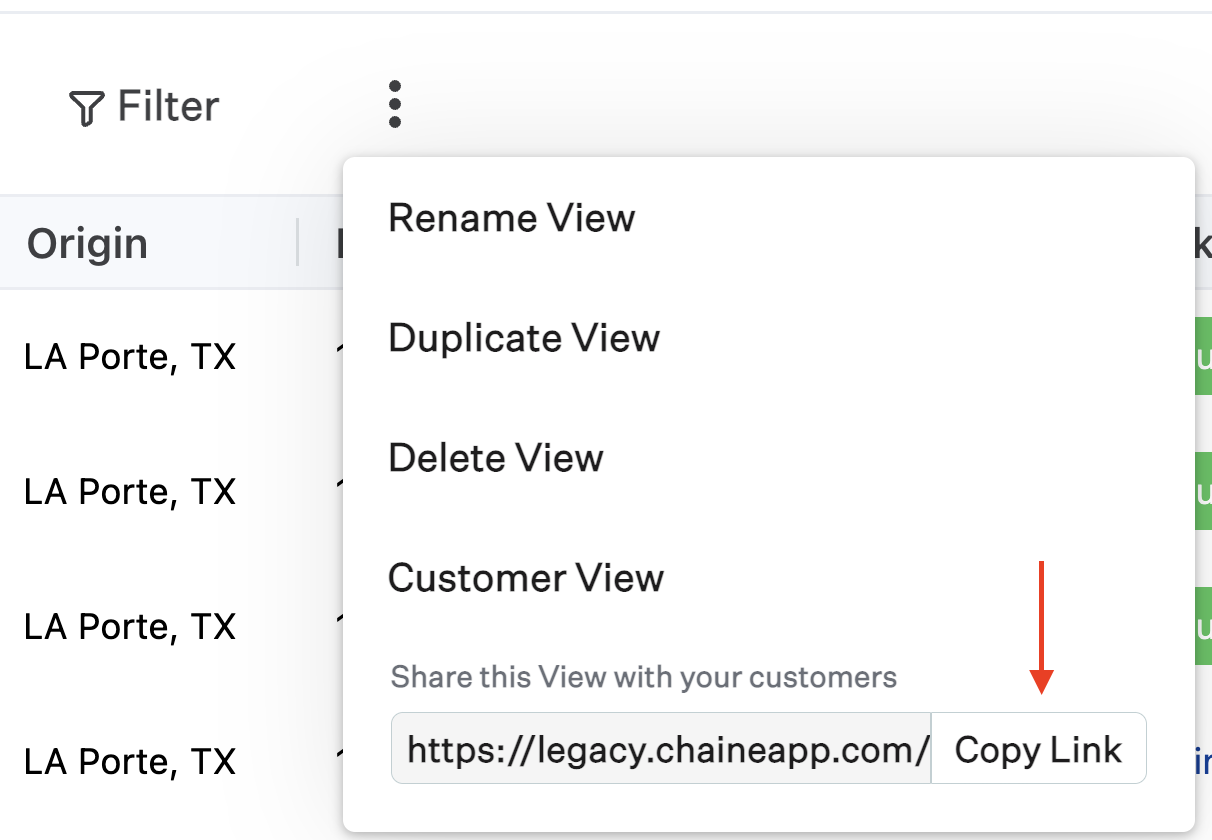
- Now you can paste this URL and share it with your customers. Before sharing, paste it in a new browser tab to verify everything looks as you expect it to for your customer.
This view will show all the loads that are in the filter, and since you have selected a Customer filter with their name, it will only show that customer those loads. The customer gets an overall status along with the map that shows the trucks location. If a load is not tracking, but you are regularly updating the status, this will also reflect on this view.